


DTF Printing Process Explained Step by Step

You've sent the artwork, approved the shirt color, and now you're waiting for the finished order. The design looked perfect on your screen, but that doesn't guarantee a clean garment. In DTF printing, the result depends on several handoffs: the file must be prepared correctly, the ink must sit properly on the film, the powder must bond to the ink, and the press must transfer the finished layer evenly.
A production lead doesn't judge a DTF job by the printer alone. They watch the entire chain, because a problem that appears during pressing often began much earlier. This guide follows the DTF printing process from artwork intake to finished apparel, with particular attention to the interfaces where film, ink, powder, curing, and heat pressing can succeed or fail together.
Table of Contents
What the DTF Printing Process Actually Looks Like on the Shop Floor
The Four Core Materials Behind Every DTF Transfer - Film gives the image a temporary home - Ink provides color and structure - Powder creates the garment bond - Heat turns the stack into a finished print
Quality Control and Troubleshooting at Each Stage - When the transfer feels gritty or washes poorly - When edges lift or the image cracks - When color, white, or detail looks wrong
How Customers Can Get Better Results from a DTF Order - Questions to ask before approving production
What the DTF Printing Process Actually Looks Like on the Shop Floor
A logo arrives for a run of work shirts. Before any machine starts, the artwork operator opens the file, checks for a transparent background, and confirms that the design remains sharp at its intended size. Stray pixels and semi-transparent edges receive attention because they can create a pale haze around the finished print.
The file then moves into RIP software, which translates the artwork into instructions for the printer. The operator checks color handling, mirrors the design, and confirms that the white ink layer will support the colored image. A production view of this preparation stage can be seen in this DTF artwork and production workflow visual.
The printer places the image on the coated side of clear PET film. The film functions as a temporary carrier, holding the design until the garment is ready. CMYK ink builds the visible colors, while white ink creates the supporting layer that keeps those colors strong on dark or colored fabric. If the white layer is uneven, later powder and pressing steps cannot fully correct the result.
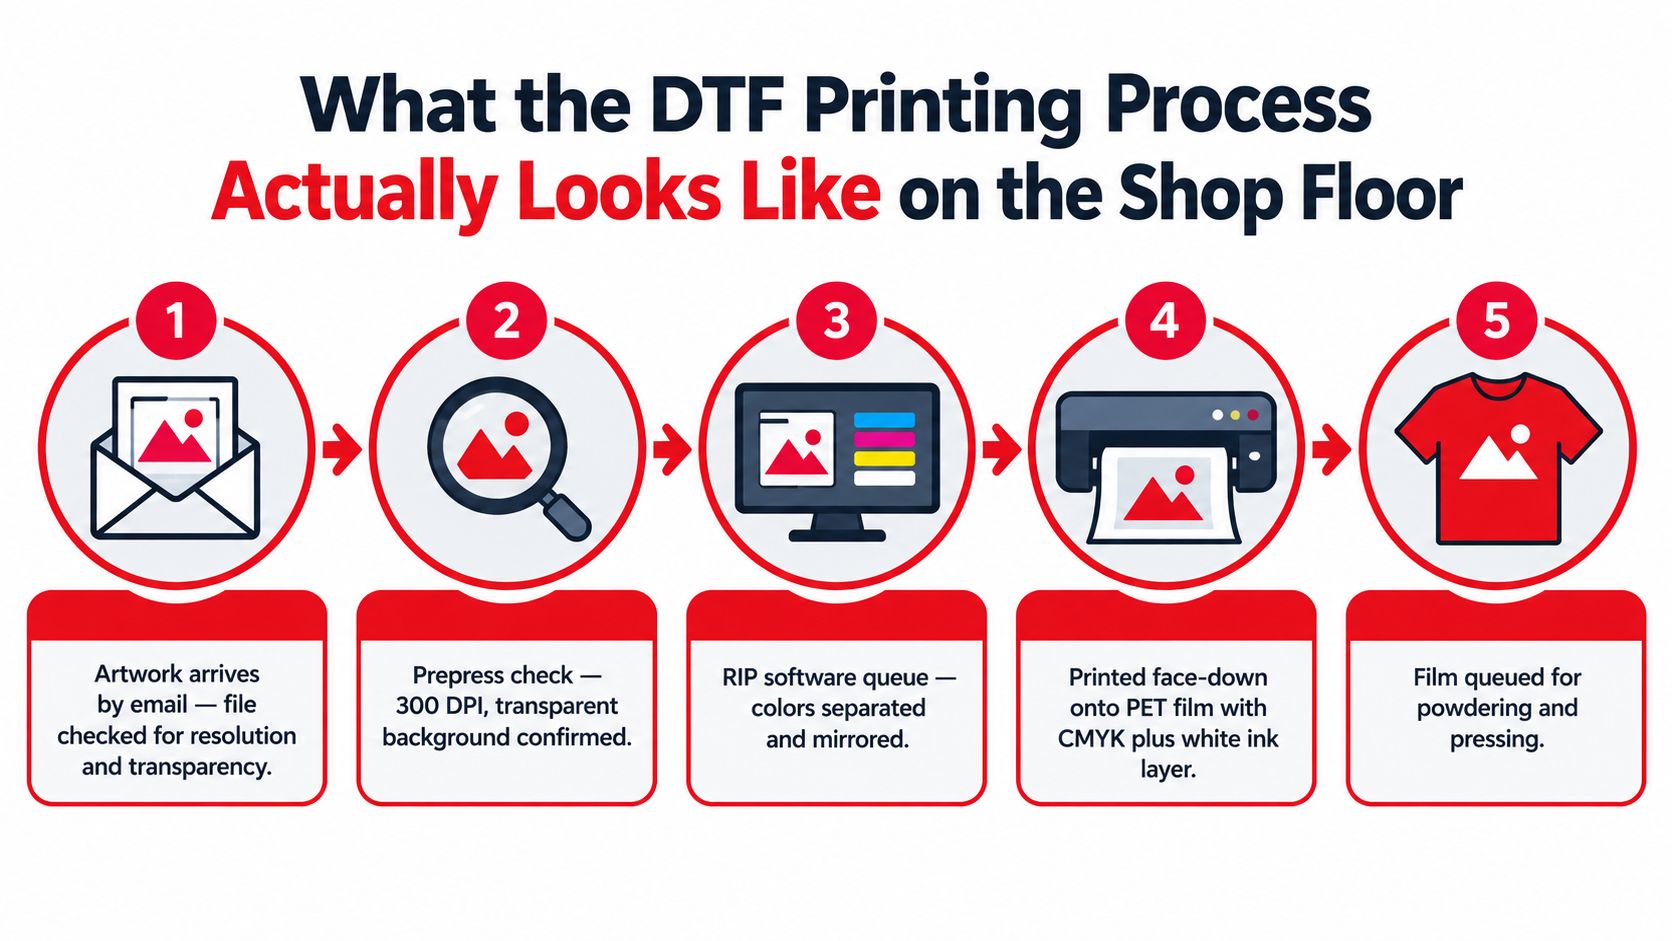
While the ink remains wet, the operator applies hot-melt adhesive powder. Excess powder is removed so it stays on the printed areas instead of coating the blank film. The sheet then enters a curing oven or heating unit, where loose granules melt into a continuous adhesive layer. Poor coverage or incomplete curing can leave weak spots between the film and garment.
At the heat press, the blank shirt is pressed briefly first, removing moisture and flattening the decoration area. The operator positions the transfer film-side up or down according to the film system, then controls heat, time, and pressure. After the specified peel, the film lifts away, leaving a flexible ink-and-adhesive layer bonded to the fabric.
Production rule: The shirt is only the final surface. The transfer depends on every handoff, from file preparation and powder coverage to curing and press setup.
How Direct-to-Film Printing Works and Where It Came From
Direct-to-film printing, usually shortened to DTF, is a transfer method. The printer creates the design on a coated PET release film, applies a thermoplastic hot-melt adhesive powder, cures that powder, and then uses a heat press to move the finished transfer onto fabric.
That sequence makes DTF different from direct-to-garment printing. DTG prints directly onto the garment, usually after the fabric has received pretreatment. DTF keeps the image on film until the pressing stage, so the printer and the garment don't need to meet during the initial color application.
Screen printing uses another physical route. A shop pushes ink through mesh screens and uses separate screen preparation and registration steps for the design. DTF uses a digital file and can reproduce detailed, multicolor artwork without creating a separate screen for each design element.
The technology grew out of older transfer ideas, particularly plastisol heat transfers and white-toner transfer methods, while borrowing the digital color workflow associated with DTG. Commercial DTF printing emerged in the late 2010s, then became more practical in the early 2020s as converted and purpose-built printers became more affordable. Early adopters included small print shops in Asia and a limited number of experimenters in the United States, while by the mid-2020s the method had moved into mainstream apparel decoration. These stages are described in the history and development of commercial DTF printing.
The important point isn't that DTF replaced every other method. It created a useful middle ground. A shop can prepare detailed digital artwork, hold transfers for later pressing, and apply designs to cotton, polyester, and blends without changing the basic transfer architecture.
The Four Core Materials Behind Every DTF Transfer
A DTF transfer works as a connected stack. The film carries the image, the ink builds its color, the powder creates adhesion, and heat turns those layers into a print that can stay on fabric. A problem at any interface can appear as a printer fault, even when the machine has completed its cycle correctly.
Film gives the image a temporary home
PET film needs a coated release side. The coating gives wet ink a controlled surface, then lets the cured transfer separate during pressing. If the film does not accept the ink evenly, edges may spread, fine detail may soften, or the powder may sit unevenly. Clean handling matters too. Dust, fingerprints, or scratches can interfere with the transfer surface.
Ink provides color and structure
DTF ink is a water-based pigment system made for film transfer. CMYK produces the visible color, while white ink supplies opacity and separates the design from the garment. White ink needs regular circulation and nozzle checks because settling, poor circulation, or blocked nozzles can leave gaps in coverage. On a dark shirt, those gaps can make otherwise accurate colors look dull.
Powder creates the garment bond
Hot-melt powder, commonly a polyurethane adhesive, is the glue layer between the printed image and the fabric. It should cover the wet image evenly, with excess removed from the surrounding film. Too little powder leaves weak areas that may lift. Too much can create a heavy hand feel or a visible adhesive border. The powder must match the ink and film, because these materials need to melt and release as one system.
Heat turns the stack into a finished print
Curing and pressing settings must suit the film, powder, ink system, and garment. Neutral process guidance places adhesive curing at roughly 280 to 320°F, or 138 to 160°C, for about two to three minutes, followed by pressing around 320 to 330°F for 10 to 15 seconds under medium pressure. The technical overview of DTF and DTG transfer behavior explains why under-curing can leave adhesive insufficiently melted, while over-curing can create a brittle layer. Uneven platen heat or pressure can cause the same settings to produce different results across one garment.
Material | Role in the Transfer | Key Spec or Setting |
|---|---|---|
PET film | Holds the printed image and releases it during pressing | Use the coated release side and keep it clean |
CMYK plus white ink | Creates color and an opaque supporting layer | Maintain circulation, nozzle condition, and ink sequence |
Hot-melt adhesive powder | Bonds the printed image to the garment | Apply evenly while the ink is wet, then remove excess |
Heat press and curing system | Melts the adhesive and activates the garment bond | Use the matched cure window, then apply even heat and pressure |
A shop should treat these consumables as a matched package, not interchangeable supplies. This visual reference for DTF transfer materials shows why the transfer should be judged as a system, not as printer output alone.
Step-by-Step DTF Workflow from Artwork to Finished Garment
A transfer succeeds through a chain of handoffs. The artwork must suit the film, the ink must stay wet for powder, the powder must cure evenly, and the press must join that finished layer to the fabric. A problem at one interface can appear only after washing.
Prepare the artwork. The operator opens the file in the RIP workflow, confirms the intended print size, transparency, edges, and color profile, then mirrors the image if the film system requires it. The RIP also generates the white underbase. Clean edges and suitable detail matter because fine artwork can lose clarity when reduced to its final physical size.
Print onto PET film. The printer lays down CMYK plus white ink on the coated side. The image should show even color and a complete white layer where needed, without banding, missing areas, or wet pooling. The sheet needs careful handling here. Ink that smears or dries unevenly changes how well the powder will bond.
Apply the adhesive powder. While the print is still wet, the operator spreads hot-melt powder over the image and removes the excess. Coverage should be continuous across every printed area, with no bare spots and no large field of loose powder around the design. Film, ink, and powder must meet in the right condition. Uneven coverage creates weak or inconsistent adhesion later.
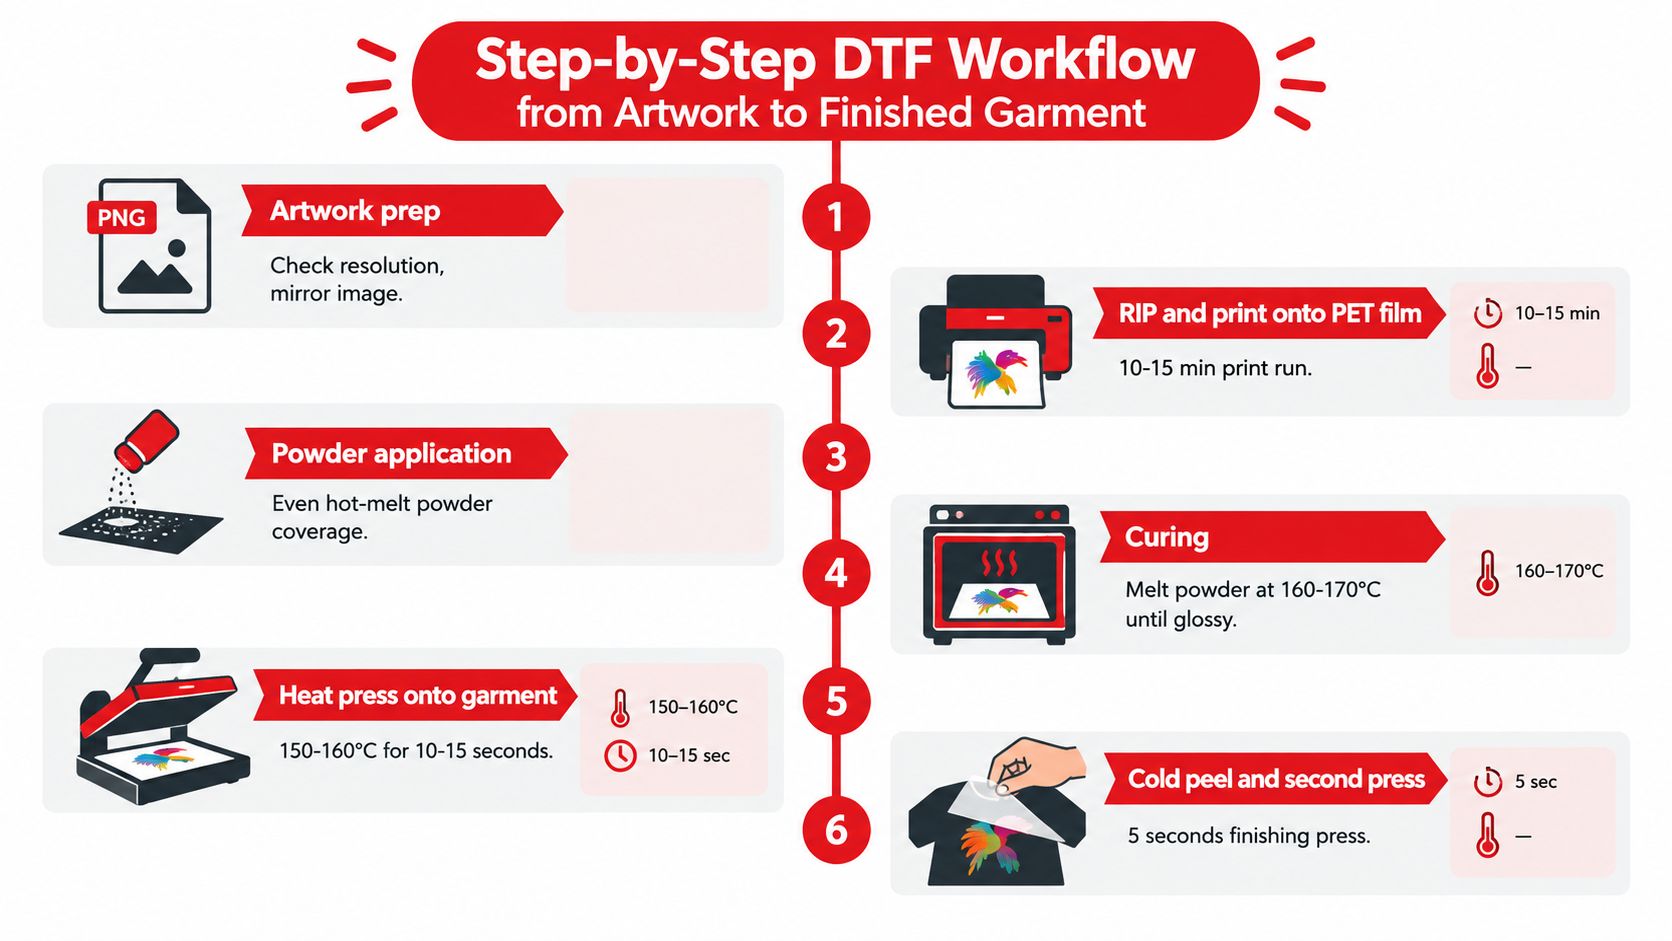
Cure the powder. The sheet moves through an oven, shaker-dryer, or comparable curing unit. Heat must melt the powder into a continuous adhesive layer without overheating the transfer. A properly cured surface looks smooth rather than grainy, and the powder should no longer move freely when the film is handled.
Prepare the garment. The operator checks the blank for lint, folds, seams, and moisture, then briefly pre-presses the print area. This flattens the landing surface and gives the adhesive more consistent contact with the fabric. Texture or moisture left at this stage can disrupt the bond even when the transfer itself looks correct.
Press, peel, and finish. The cured transfer is placed in the correct orientation and pressed using settings matched to the transfer system and fabric. Guidance commonly places the garment press near 320 to 330°F for 10 to 15 seconds under medium pressure as outlined in the process guidance. The operator follows the film's hot-peel or cold-peel requirement, then applies a short finishing press when the system calls for one.
The physical sequence is straightforward: a file becomes wet ink on film, then a powder-coated and cured transfer, then a bonded garment print. The DTF workflow demonstration video shows the handling and movement that written settings cannot fully convey.
Quality Control and Troubleshooting at Each Stage
The fastest diagnosis starts with the visible symptom and works backward to the stage that created it. Repressing a bad transfer may hide a symptom temporarily, but it won't correct a missing white layer, poor powder coverage, or an incorrect cure.
When the transfer feels gritty or washes poorly
A gritty surface often points to powder that hasn't fused into a smooth adhesive layer. Loose or partly melted granules can also contribute to weak adhesion and poor wash performance. Check the curing temperature, dwell time, powder distribution, and whether the film passed evenly through the heating zone.
Under-curing leaves the TPU adhesive insufficiently melted. Over-curing can make the adhesive brittle and reduce bond strength, so adding more heat isn't a safe universal fix. The cure window must match the consumables and equipment.
When edges lift or the image cracks
Lifted edges can result from insufficient heat, uneven pressure, moisture in the garment, a mismatched film and powder combination, or peeling at the wrong point for that film. A press that reads the correct temperature at one location may still have uneven heat across its platen.
Cracking after washing can begin with over-curing, an unsuitable press setting, or a transfer that never fully bonded. Check a retained production sample and compare the center, edges, and fine details rather than judging only one spot.
Diagnostic habit: Record the film, ink, powder, cure setting, press setting, garment type, and peel method for every new production combination. Change one variable at a time.
When color, white, or detail looks wrong
Color shifting and banding usually require a check of the RIP profile, printhead condition, nozzle output, and ink sequence. Dull whites can indicate incomplete white coverage or clogged nozzles. A design that looked correct on screen may still need a printed color proof because the film and garment introduce different visual conditions.
Polyester can create another problem through dye migration. If the garment's dye moves into the transfer during pressing, the print can change color even when the artwork, ink, and powder were correct. The shop should test unfamiliar polyester garments before accepting a larger run.
DTF Compared with Screen Printing, DTG, and Sublimation
Choosing a decoration method starts with the garment and order pattern, not with a favorite machine. DTF is often a practical fit for detailed artwork, mixed fabrics, dark garments, and low-setup work. That doesn't make it the automatic choice for every job.
Method | Best Volume | Fabric Range | Setup Cost | Durability and Hand Feel |
|---|---|---|---|---|
DTF | One-offs through flexible small and medium runs | Cotton, polyester, and blends, subject to transfer testing | Low setup per design because artwork is prepared digitally | Flexible transfer feel, with durability dependent on film, powder, cure, and press control |
Screen printing | Repeated larger runs of the same design | Broad garment range, with ink and fabric selection affecting the result | Higher preparation burden because screens and registrations are required | Strong, familiar ink feel that can become heavier with larger ink coverage |
DTG | On-demand cotton apparel and detailed image work | Best suited to cotton and compatible cotton-rich garments | Requires garment preparation and direct-print equipment | Very soft feel on suitable cotton, with the fabric and pretreatment influencing the result |
Sublimation | Polyester-focused products and apparel | Primarily light polyester and compatible coated products | Requires sublimation equipment and suitable blanks | Dye becomes part of the compatible surface, with little or no raised print feel |
DTF's main advantage is the transfer architecture. The shop can print detailed color artwork before pressing it onto different garment types, including dark fabrics, without building separate screens for each color. It also avoids the direct garment pretreatment stage associated with DTG.
Screen printing remains compelling when the same design is repeated in a substantial run, because its setup effort can be spread across many garments. DTG is a strong choice when the softest possible cotton hand feel matters more than broad fabric flexibility. Sublimation remains difficult to beat for vivid, integrated color on suitable polyester because the dye enters the surface rather than sitting as an adhesive-backed layer.
The right question is not “Which method is best?” Ask instead which method matches the fabric, artwork, quantity, feel, and repeatability the order requires. This method comparison visual can help organize that conversation before production begins.
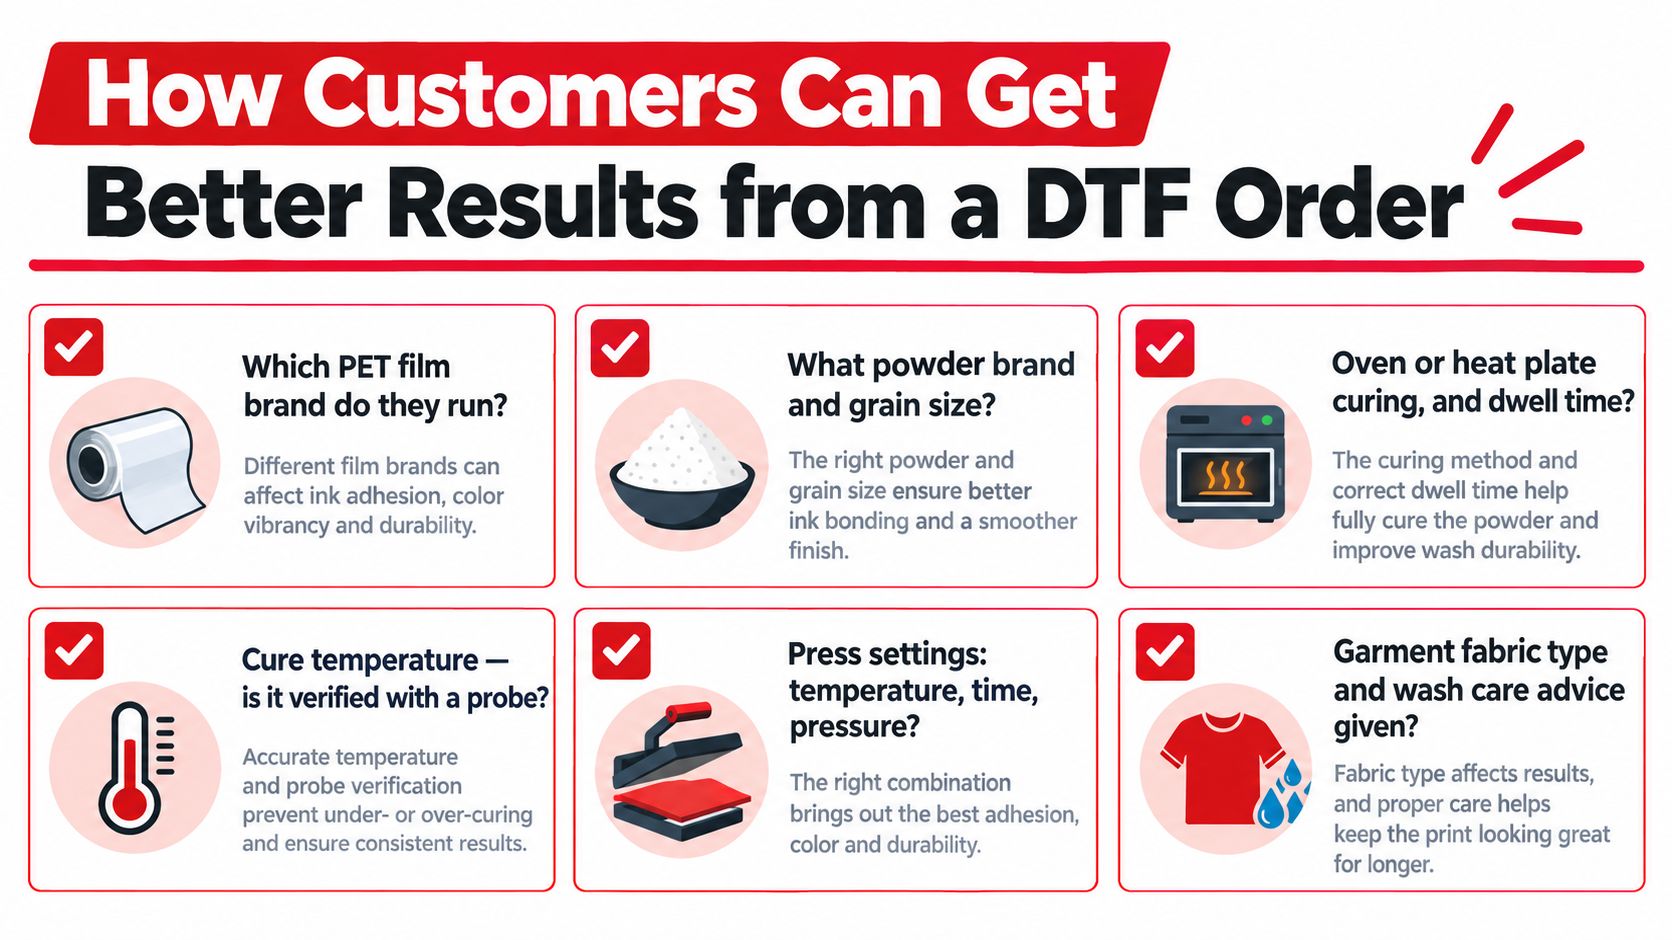
How Customers Can Get Better Results from a DTF Order
Treat the shop visit like a quality interview. A professional answer shouldn't stop at printer brand or advertised resolution. Ask how the shop controls the complete system, because recent market coverage of DTF printer purchasing describes growing attention to film, powder, ink, curing, software, heat-press compatibility, maintenance, handling, safety, and service support together.
Questions to ask before approving production
Film: Which PET film system do you run, and is it compatible with the powder and ink?
Powder: Which hot-melt powder do you use, and how do you control coverage and excess removal?
Curing: Do you use an oven, shaker-dryer, or another method, and how do you verify the actual cure?
Pressing: What temperature, time, pressure, and peel method do you use for this garment?
Testing: Can you provide a physical proof or sample on the actual blank?
Repeat orders: Do you retain the production settings and consumable details so a reorder follows the same workflow?
Prepare the artwork at its actual intended print size. Flatten unwanted transparency, supply a clean background, and ask the shop which file format and color profile its RIP workflow expects. A screen preview is useful for approval, but it can't show how the transfer will feel on a particular fabric.
Request a physical proof before committing to a full order, especially for unfamiliar garments, dark polyester, large solid areas, or color-sensitive branding. Wash-test the sample at home according to the care instructions and inspect the edges, fine detail, color, and hand feel afterward.
Consumable consistency matters too. Market coverage identifies variability in ink and film quality as a challenge that can affect adhesion, color vibrancy, fading, cracking, and washability. A shop that can explain its testing and reordering process is giving you more useful information than one that only quotes a printer model.
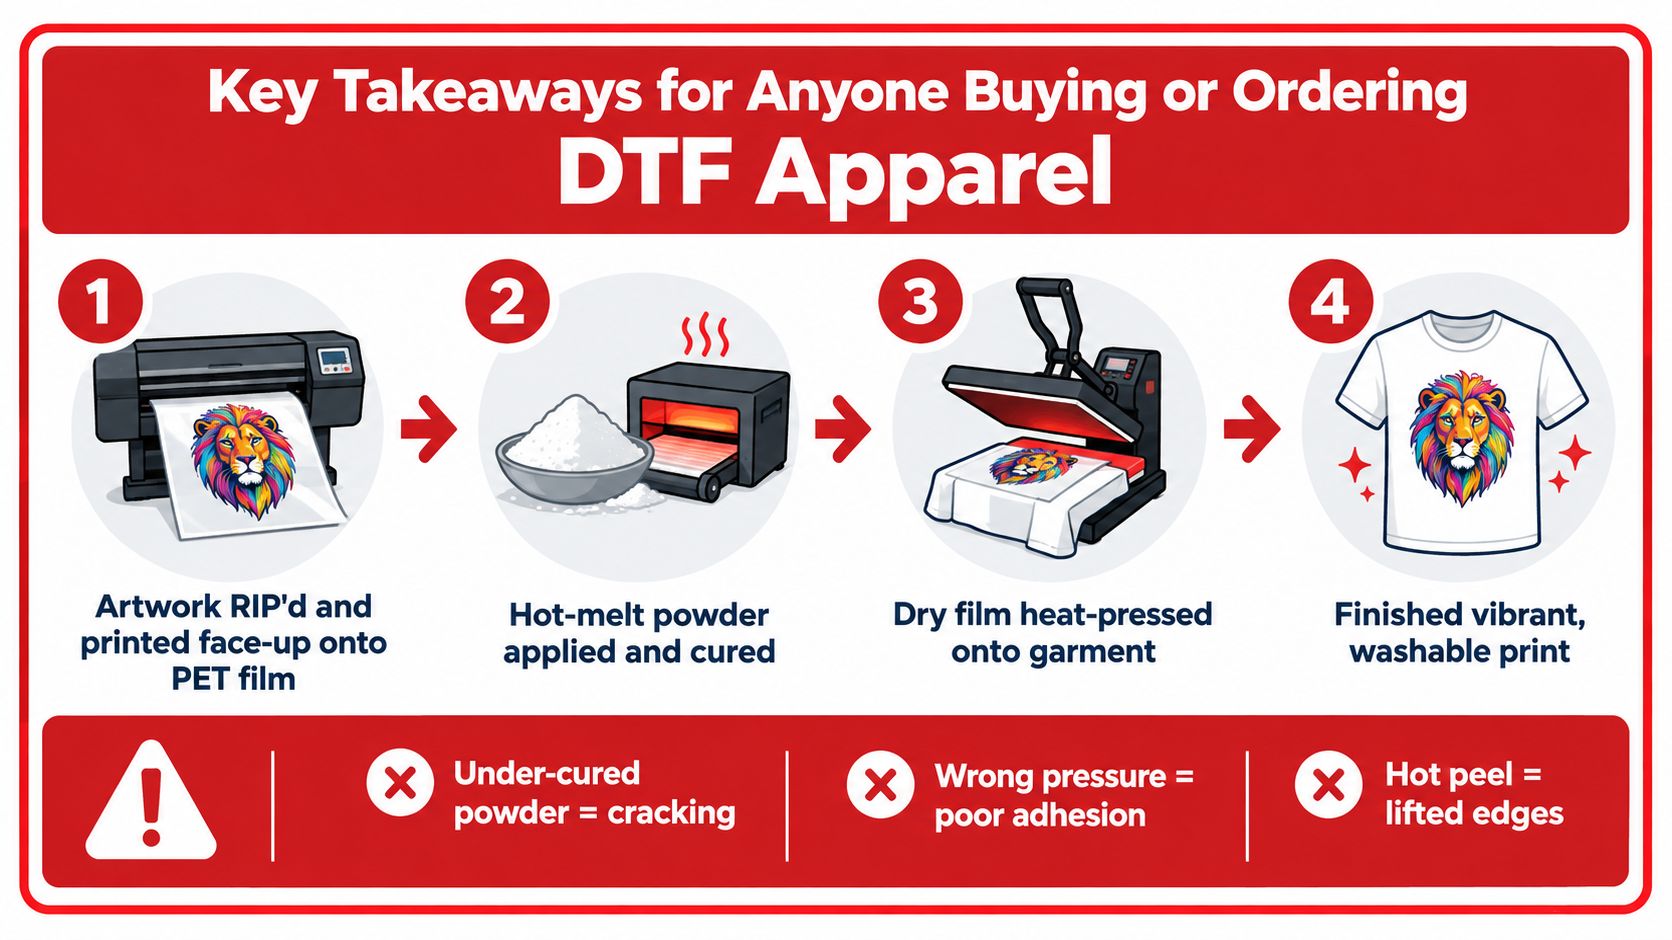
Key Takeaways for Anyone Buying or Ordering DTF Apparel
Keep one mental model in mind. Artwork is prepared and RIP-processed, the image is printed onto PET film, hot-melt powder is applied and cured, and the dry transfer is heat-pressed onto the garment.
A visible defect on the shirt often started earlier. Weak adhesion may trace back to powder or curing, a dull image may begin with white ink or RIP output, and lifted edges may reflect pressure, moisture, or peel timing. The printer is only one part of the production system.
DTF is useful because it can support detailed designs across cotton, polyester, blends, and dark garments when the transfer system and garment are properly matched. That flexibility still depends on consistent consumables, controlled curing, even pressing, and a proofing routine.
Before placing an order, prepare the artwork to its final size, identify the garment fabric, ask how the shop controls film and powder, approve a physical proof, and wash-test the result before scaling up. That sequence gives you a much clearer basis for judging a DTF order than a machine specification alone.
Wear X Apparel, LLC offers custom DTF printing for T-shirts, hoodies, teams, events, organizations, and made-to-order merchandise, with garment selection and production support available for custom projects. Visit Wear X Apparel, LLC to discuss your artwork, choose suitable apparel, and request a DTF order built around your intended use.
Comments