


Is My Shirt Too Small: Signs, Fixes, and What to Do Next

You're in front of the mirror, tugging the hem down, turning sideways, and wondering whether the shirt shrank or your body changed. The answer isn't hidden in the label. A shirt is too small when its measurements fail at the chest, shoulders, sleeves, collar, or movement points, even if the size printed inside looks familiar.
That makes “is my shirt too small” a data question, not a style mystery. You can get a reliable first answer in under five minutes, then choose the right response: size up, alter the garment, or restyle the design and cut. That approach matters even more for custom DTF apparel, where a poor fit can affect comfort, print placement, and whether the finished order gets worn.
Table of Contents
Measure Yourself the Way a Pattern Maker Would - Take the measurements correctly
Reading the Stress Points on a Shirt - Shoulder seams - Button placket - Collar - Hem - Armholes and sleeves
Why Movement Tests Catch What the Mirror Misses - Reach forward and overhead - Sit with your arms crossed - Reach behind your back
Ordering Custom Shirts That Fit on the First Try - 1. Record the four measurements - 2. Match the garment chart - 3. Send a fit reference - 4. Attach the information to the order - Use the next-morning check
Quick Fit Checklist and Common Questions - One decision that prevents a bad custom order
The Five-Second Fit Check You Can Do Right Now
Stand naturally in the shirt. Keep your stomach relaxed, let your shoulders rest, and fasten the garment as you normally would. Run these five checks before taking measurements.
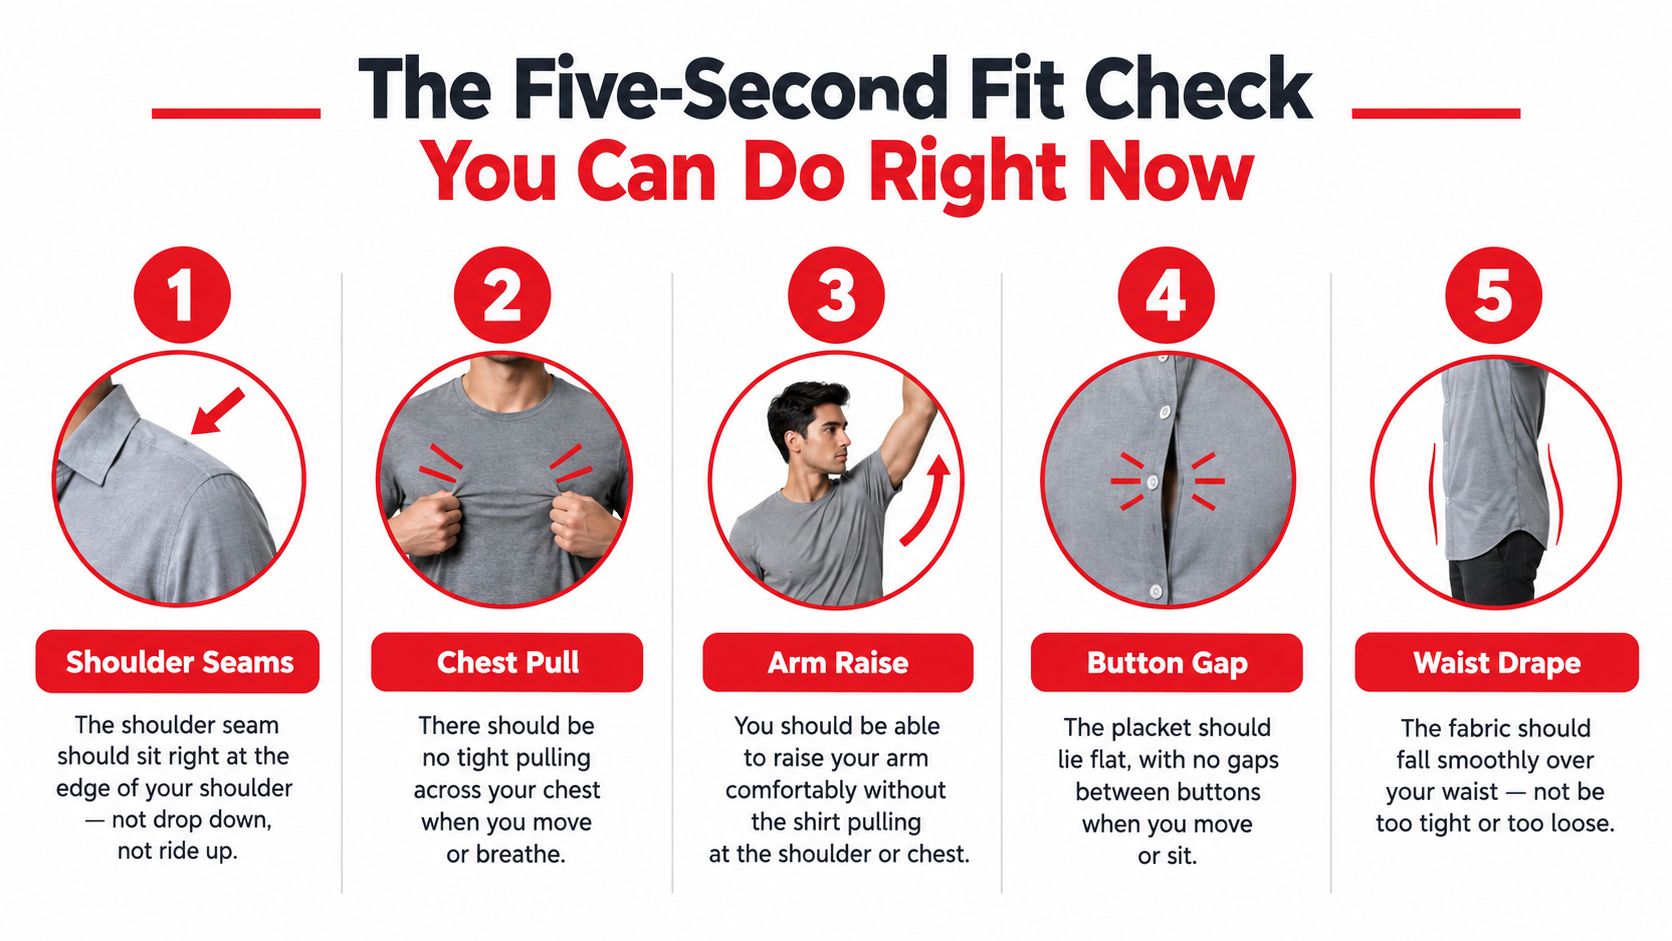
Check the collar. Fasten it fully and slide two fingers inside. It should feel close without pressing your throat. If two fingers do not fit without force, the neck is too tight. A collar that stands away from your neck can indicate the cut is wrong, rather than the entire shirt being too small.
Check the chest. Pinch the fabric over the fullest part of your torso. Some slack allows breathing and movement. If the fabric lies stretched flat, or the pinch disappears when your arms relax, the chest panel does not provide enough room.
Check the shoulder seams. The seam should end near the shoulder bone, where the shoulder slopes into the upper arm. A seam pulled toward your neck indicates a narrow shirt. A seam extending well down the arm indicates a broad or deliberately relaxed cut.
Watch the buttons. Horizontal ripples from the placket show that the front is under tension. A straight, clean button line passes. A gap, twisting placket, or repeated pull lines means the chest or midsection needs more room.
Feel the hem. Raise your arms slightly, then lower them. The hem should settle without riding sharply upward or bunching at the waist. If it stays high, the body may be too short, or tightness through the chest and shoulders may be pulling the shirt upward.
Quick decision: If the collar, chest, shoulders, and button line pass but the hem fails during movement, test mobility before changing size.
Use the results as fit data, not a vague impression. A failing collar points to the neck or cut. Shoulder and chest failures usually call for a different size or pattern. A movement-only hem problem may call for a longer body or a roomier cut. Apparel sizing guidance supports comparing garment measurements with body measurements and the ease needed for wear.
If two or more checks fail, take tape measurements before ordering a larger shirt. For custom DTF apparel, that evidence helps you choose whether to size up, alter the garment, or restyle the design and cut.
Measure Yourself the Way a Pattern Maker Would
A shirt can feel “too small” because the body is tight, the sleeves are short, or the collar is restrictive. Replace that guess with measurements you can collect in a few minutes, then compare them with the specific garment chart before choosing a larger size, an alteration, or a different cut.
Take the measurements correctly
Use a soft tape and measure over a thin layer or directly on the body. Stand naturally, keep your posture relaxed, and avoid holding your breath. Thick clothing, slouching, and a tight tape create inaccurate results, as the body-measurement instructions from Dummies explain. Measure twice, record the result, and use the chart's unit.
Chest or bust: Wrap the tape around the fullest part of the torso, under the arms and across the shoulder blades. Keep it level and snug without compressing the body. Do not pull the tape tight to make the number smaller.
Shoulders: Measure across the back from one shoulder bone to the other. Ask someone to help. The tape should run straight across the back, not follow the curve of the shoulders or angle downward.
Sleeve: Start at the shoulder bone and run the tape along the outside of the relaxed arm to the wrist bone. Keep the arm at your side. Bending the elbow or reaching forward adds length that the pattern does not require.
Neck: Place the tape around the base of the neck where the collar will sit. Leave enough room for one finger if you are checking a wearable collar. The raw neck measurement is not the finished collar size, because the collar needs breathing room.
Write the results down before checking the product page.
Measurement | How to Take It | What to Compare |
|---|---|---|
Chest or bust | Around the fullest torso point, under the arms, tape level | The chart's body or finished chest measurement |
Shoulders | Straight across the back between shoulder bones | The garment's shoulder width |
Sleeve | Shoulder bone to wrist with the arm relaxed | The listed sleeve length and cuff position |
Neck | Around the neck base with room for one finger | The collar or neck opening |
Read the chart carefully. Some brands list body measurements, while others list finished garment measurements. Flat measurements are often doubled for comparison with the full garment width. Compare like with like, and account for the shirt's intended ease. A fitted athletic cut should sit closer than a relaxed shirt.
For a heavier layer, use the garment's own cut as the standard. The RXB Marlboro Rodeo Hoodie is described as a generous-fit hoodie made from an 8.5 oz./yd² US, 16.7 oz./L yd Canadian, 70/30 ring-spun cotton/polyester three-end fleece blend, with a fleece-lined hood and ribbed cuffs and waistband. Judge it as a relaxed hoodie, not as a fitted T-shirt.
Save the measurements in your phone or order form. Reuse them for reorders, and update the record when your body or preferred fit changes. For a custom DTF order, these numbers give you a clear basis for sizing up, altering the blank, or restyling the design.
Reading the Stress Points on a Shirt
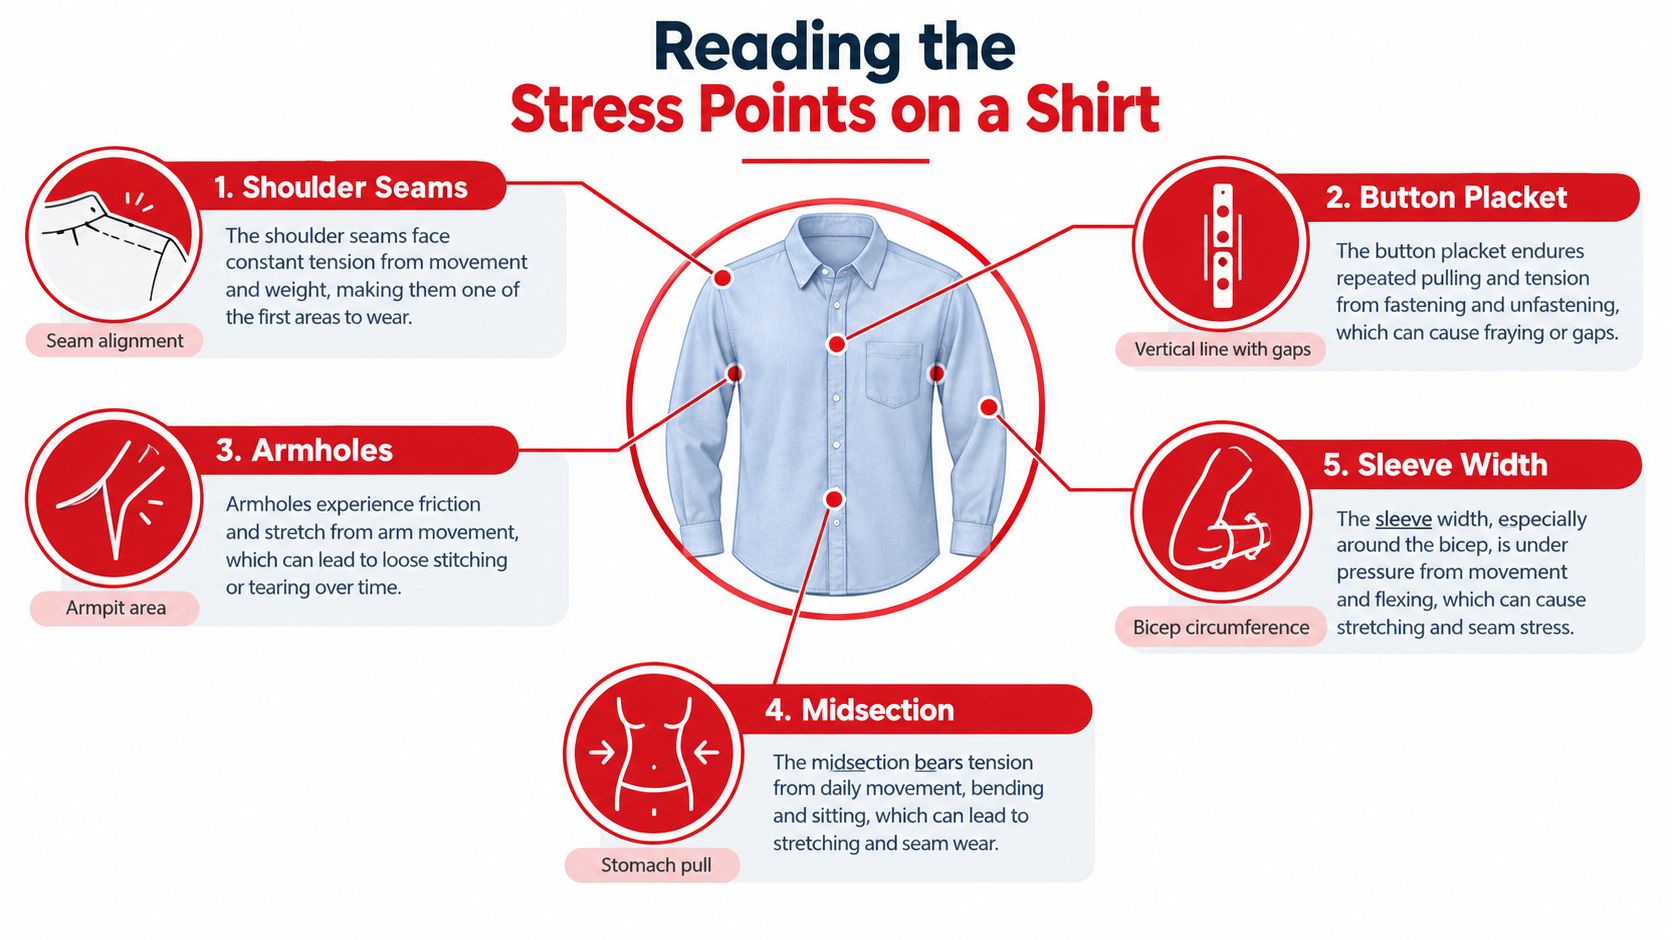
A shirt doesn't fail everywhere at once. It tells you where the shortage is through tension, displacement, and restricted movement. Read the stress point before deciding to buy a larger size.
Shoulder seams
The shoulder seam belongs near the shoulder bone. If it drifts toward your neck, the shoulder span is too narrow. You may also see the seam pull into a V shape as the sleeve tries to accommodate your upper arm.
Fix: Size up if the shirt is a basic staple and the whole garment feels tight. For a premium woven shirt, a tailor may adjust the shoulder only if the construction allows it. Shoulder alterations are limited, so don't expect a tailor to rebuild a narrow pattern.
Button placket
Horizontal ripples across the button line are a classic chest or midsection warning. The shirt may close, but the front panel is fighting the body rather than hanging smoothly.
Fix: Choose a broader cut or size up. If the chest is the only failure and the side seams contain usable allowance, a tailor may let the shirt out. A larger size can create excess width elsewhere, so inspect the shoulders and hem before committing.
Collar
A collar that presses into the throat, folds flat, or gaps away from the neck points to a neck or collar-stand problem. Don't confuse a stiff collar with a small collar. Pressure and restricted breathing indicate inadequate room.
Fix: Select a larger neck measurement or a different collar shape. Altering a collar is possible in some dress shirts, but it's not a sensible repair for a low-cost printed tee.
Hem
If the hem lifts above the belt when you raise your arms, the body may be too short. Chest or shoulder tension can also pull the front upward, making a length problem look like a general size problem.
Fix: Try a longer body cut before just sizing up. If the width is right and the length is wrong, a longer version of the same size is a better solution than adding unnecessary width.
Armholes and sleeves
A pinched feeling under the arm means the armscye may be too high or too small. Tightness around the bicep can also make the sleeve drag the whole shirt upward when you reach.
Fix: Choose a roomier sleeve or relaxed cut. Stretch fabric can hide the problem while you stand still, but repeated tension still shows during movement and wear.
Read the pattern, not just the symptom: Two failed points usually mean the garment block is wrong for you. One isolated failure may be alterable.
Consumers experience this mismatch often. Cotton Incorporated's 2024 U.S. Sizing Survey found that 45% of surveyed consumers considered shirts to run “plus size” or outside standard expectations. The survey included 973 U.S. consumers surveyed on March 20 and 21, 2024, which gives the result a defined audience and date. Your shirt may not be defective. Its size system may just not represent your proportions.
Why Movement Tests Catch What the Mirror Misses
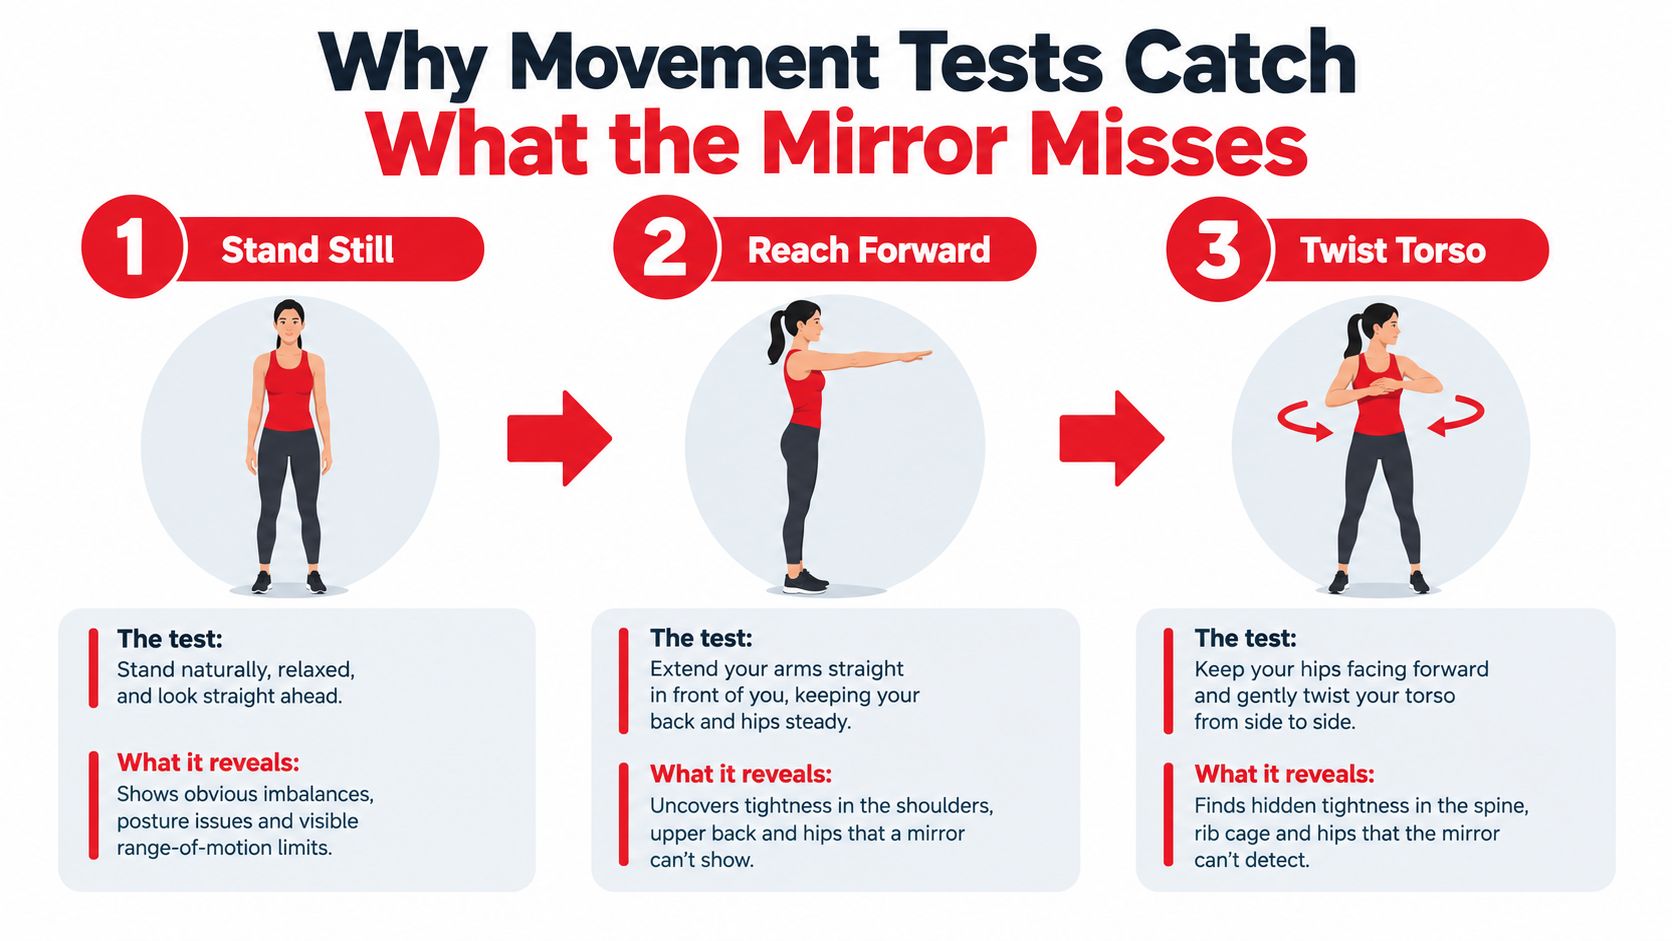
A mirror shows a static pose. Shirts are worn while reaching, sitting, driving, lifting, and turning. If you only inspect the garment with your arms at your sides, you'll miss the failures that make a shirt unbearable after an hour.
Reach forward and overhead
Extend both arms straight in front of you, then raise them overhead. Watch the hem and shoulder seams. If the hem rides above the hip, the shoulder seams pull forward, or the chest feels tight, the shirt lacks functional room through the chest, shoulders, or armholes.
A shirt doesn't need to remain perfectly still during this test. It should, however, let you move without exposing the torso or creating sharp pulling across the upper body. If the sleeve drags the body upward, measure the shoulder and sleeve rather than blaming the waist.
Sit with your arms crossed
Sit in a chair and cross your arms. This expands the upper body and compresses the midsection, revealing tension that disappears while standing. Buttons that strain, a placket that gaps, or fabric that pulls across the stomach means the front needs more width or the cut needs more ease.
This test matters for work shirts and event apparel because a garment that looks fine for a photograph may fail during a meeting, meal, or drive.
Reach behind your back
Clasp your hands behind your back and lift them gently. If the yoke rides toward your neck or the back panel tents, the shoulder or upper-back cut is too narrow. Don't force the movement. You're testing comfort, not trying to stretch the shirt.
Movement rule: If the shirt passes while standing but fails two movement tests, treat it as too small for its intended use.
For a visual reference while checking posture and garment movement, use this shirt fit illustration.
The practical lesson is simple. A shirt that only works when you stand still is not a good fit. Choose the fix based on the failing area, not on how familiar the size label looks.
Size Up, Alter, or Restyle
Once you've confirmed the shirt is too small, stop trying to negotiate with it. Decide whether the garment deserves a larger size, a targeted alteration, or a different style entirely.
Size up when the shirt is a staple and tightness appears across several areas. This is usually the cleanest choice for a crew-neck tee, polo, oxford, or cotton-blend shirt. It's especially sensible when the shoulders, chest, sleeves, and hem all feel constrained. The downside is predictable: a larger size may add unwanted width at the waist or length through the body.
Alter when the garment is worth preserving and the failure is isolated. A premium dress shirt, branded button-down, or linen shirt may justify tailoring if the chest or sleeve needs adjustment and the construction includes enough seam allowance. A tailor can work with existing fabric. They can't create room that was never cut into the garment.
Restyle when the basic shape is wrong. A slim-cut shirt on a broad chest, a short sleeve that pinches at the armscye, or a printed shirt whose artwork sits badly after sizing up may need a different base garment. For custom apparel, a fresh print on a better cut often looks more intentional than forcing the original shirt to work.
Option | Best When | Fabric & Shirt Type | Cost & Time | Watch Out For |
|---|---|---|---|---|
Size up | Several stress points fail | Basic tees, polos, cotton blends | Usually the simplest replacement | Extra width or length in areas that already fit |
Alter | One area fails on a valuable garment | Dress shirts, linen, branded woven shirts | Requires a fitting and a capable tailor | Limited seam allowance, especially at shoulders |
Restyle | The cut conflicts with your proportions or print | Custom tees, slim cuts, tight sleeves | Requires a new garment choice and possibly a new print | Choosing another size of the same unsuitable cut |
Use the custom DTF apparel reference to think about the artwork and garment as one system. A print can be technically correct and still look misplaced if the chest is too tight, the hem is too short, or the shirt pulls across the design.
My replacement rule: If more than two major stress points fail, replace or restyle the shirt. Don't pay to chase a bad pattern.
Body change also affects the decision. Rapid changes in body shape can make a previously comfortable shirt feel too small before your wardrobe catches up. A 2026 Hohenstein Global Size Study announcement shows that the industry is still collecting broader fit data to represent body shapes more accurately. A separate 2026 consumer report surveyed 2,315 UK adults about how GLP-1-related weight changes affect spending across categories including apparel, so shoppers dealing with changing measurements may need a temporary wardrobe strategy rather than a permanent size decision. The report details also support treating fit as a measurement problem, not a label problem.
Ordering Custom Shirts That Fit on the First Try
A custom order should begin with the garment, not the artwork. Printing a great design on the wrong shirt only produces a better-looking fit problem.
1. Record the four measurements
Use the chest, shoulder, sleeve, and neck measurements from the earlier method. Write them in inches or centimeters, never only as “medium” or “large.” If someone else will wear the shirt, measure that person instead of guessing from your own proportions.
2. Match the garment chart
A custom unisex tee, relaxed-fit tee, polo, and hoodie can use different base blocks. Choose the chart for the actual garment and compare its finished measurements with your body measurements. Don't substitute the size you usually buy from another brand.
3. Send a fit reference
Lay a shirt that fits well flat and measure across the chest. Photograph the garment with the tape visible, or photograph the shirt that's too small beside the body to show where it fails. Include notes such as “tight at bicep,” “collar comfortable,” or “hem rises when arms lift.”
4. Attach the information to the order
When working with a printer such as Wear X Apparel, place the measurement sheet and reference photos in the order notes or artwork upload field. The production team needs garment context before sizing the print file, especially if the design spans the chest or back.
You can also review the RXB brand artwork reference when considering how a bold graphic will sit on the chosen garment.
Use the next-morning check
If any measurement looks questionable, take it again the following morning before submitting the order. Check the tape position, keep your posture natural, and verify that the numbers are written in the same unit as the size chart.
Production habit: Save one accurate measurement sheet and update it when your body or preferred fit changes. Reusing a bad measurement only repeats the same order error.
The strongest custom workflow combines three references: your body measurements, the garment's finished chart, and a shirt that already fits. That gives the printer a usable target instead of a vague size label.
Quick Fit Checklist and Common Questions
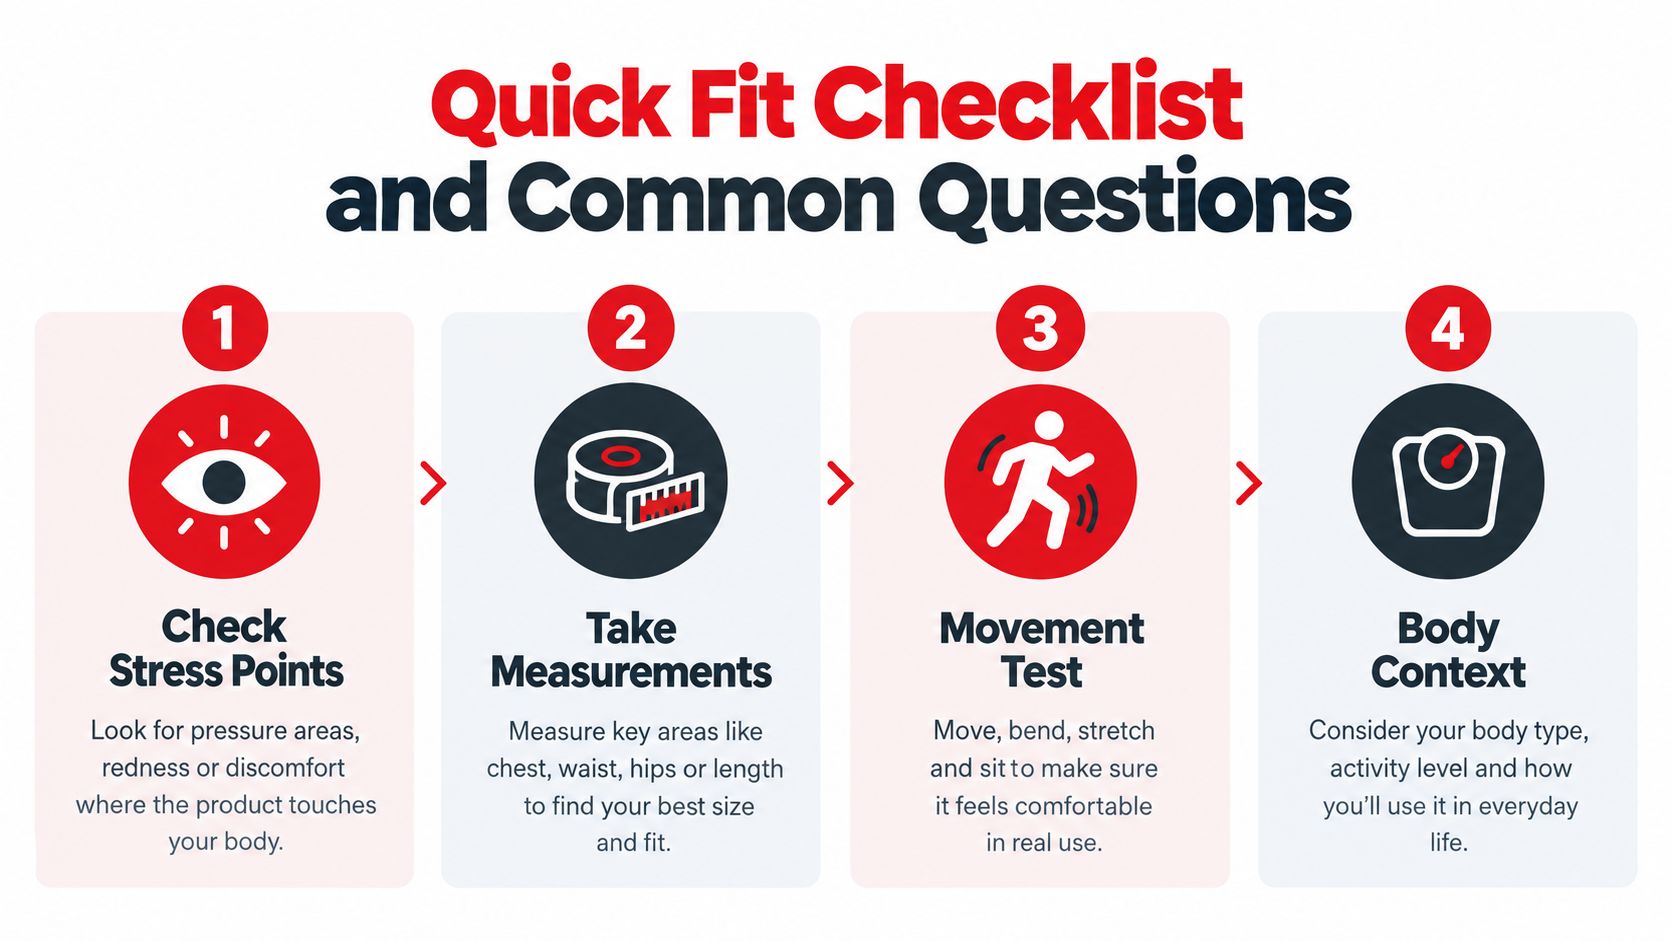
Treat the fit as a four-step data check. Use the results to choose a larger size, request an alteration, or restyle the garment for a different silhouette.
Stress points: Mark each visible pull, gap, raised hem, tight collar, or restricted armhole. Fail the shirt when two or more areas show sustained tension.
Measurements: Compare the garment chart with your chest and shoulder measurements first. If both miss, record sleeve and neck details before choosing a size.
Movement: Repeat the checks from earlier sections. Fail when two or more movements restrict reach, lift, sitting, or recovery.
Body context: Separate a changed body, washed-down dimensions, and a mismatched cut. The cause determines whether you replace, alter, or restyle the shirt.
One decision that prevents a bad custom order
If your measurements fall between two adjacent size charts, choose the larger chest or shoulder measurement. A slightly fuller body is easier to refine than a shirt that restricts the upper torso. Add your preferred hem length and intended fit, such as close, regular, or relaxed, to the order notes.
Use the shirt that already fits as a physical reference. Compare its finished measurements with the chart, then attach the notes and photos to the order. For custom DTF work, this gives the production team a clear garment target before sizing the artwork.
Wear X Apparel, LLC offers custom garment selection, Direct-to-Film printing for shirts and hoodies, and production support for individual pieces or batch orders. Visit Wear X Apparel, LLC with your measurements and fit reference when the current shirt fails the checklist.
Comments