


Logo on Workwear: Methods and Placement

A logo can look perfect on the approval proof and still fail in the field. A warehouse team sends uniforms through demanding laundering, a hospitality crew wears theirs through constant movement and spills, and an office team expects a polished finish at every meeting. If the decoration method doesn't match the garment and its working conditions, the result may be a logo that cracks, peels, softens, or loses its professional appearance long before the garment itself wears out.
Choosing a logo on workwear is therefore a procurement decision, not only a design decision. You need to weigh wash durability, fabric compatibility, visibility, employee comfort, safety certification, placement consistency, and the cost of replacing uniforms. A mixed uniform program rarely succeeds with one decoration method or one placement for every role.
Table of Contents
Why Your Logo Application Choice Matters - Match the decoration to the job
The Business Case for Branded Uniforms - Branding began with practical workwear
Comparing DTF, Embroidery, and Screen Print - DTF favors detail and flexibility - Embroidery prioritizes resilience and texture - Screen print makes sense for bold volume work
Strategic Logo Placement by Industry Role - Corporate and customer-facing teams - Site, security, and construction roles - Build a placement map before ordering
Navigating Safety Standards and Compliance - Treat the garment certification as a design constraint - Keep safety and identification separate
Real-World Scenarios for Custom Apparel - A ranch operation needs a garment-first decision - A corporate team needs repeatability - An event organizer needs recognition without shortcuts
Preparing Your Artwork and Garment Order - Use a production checklist
Why Your Logo Application Choice Matters
The common mistake is approving artwork before deciding how that artwork will live on the garment. A buyer checks the logo colors, sends a file, and chooses the lowest quoted application cost. Months later, the logo looks acceptable on shirts worn occasionally, but the same finish on industrial uniforms has started to deteriorate after repeated laundering.
That failure creates more than a cosmetic problem. Employees may stop wearing damaged garments, supervisors must manage replacement orders, and customers see inconsistent branding. A low initial price can become an avoidable lifecycle expense when the application method doesn't suit the uniform's environment.
Match the decoration to the job
A warehouse worker, a front-line retail associate, and a corporate manager don't place the same demands on clothing. The warehouse uniform may face abrasion, heat, grime, and frequent washing. Retail apparel may need a refined mark that remains comfortable and discreet. Corporate polos may prioritize a crisp appearance, soft hand feel, and consistent reproduction across different sizes.
A practical order brief should answer these questions before production begins:
How is the garment washed? Separate domestic laundering from industrial laundering, because heat, detergent, agitation, and handling affect decoration performance.
How often is it worn? A seasonal event shirt has a different service expectation from a daily uniform.
What fabric carries the mark? Stretch, fleece, coated outerwear, performance fabric, and tightly woven work shirts each impose different limits.
Where must people identify the wearer? A chest mark may support brand recognition, while a back mark may matter more for site or team identification.
Procurement rule: Choose the decoration method after defining the garment's working life, not before.
Embroidery and screen printing are often favored for demanding workwear because industry guidance associates them with stronger performance in heavy-wash environments. DTF can be useful for detailed, full-color designs and varied garments, but its expected performance depends on laundering conditions and application quality. The right answer isn't the most fashionable method. It's the method that keeps the logo legible, comfortable, and appropriate for the garment's actual use.
The Business Case for Branded Uniforms
Branded workwear sits at the intersection of identity, recognition, and daily operations. One industry report estimates the global workwear market at $135.2 billion in 2023, with projected growth at a 5.2% CAGR from 2023 to 2030, and reports that 45% of buyers purchase workwear with company logos for brand visibility (World Metrics workwear industry statistics). Another market source cited on the same overview places the category at USD 19.20 billion in 2025 and projects USD 28.08 billion by 2033, at a 4.9% CAGR. The differing estimates reflect different market definitions, but both point to a substantial and expanding category.
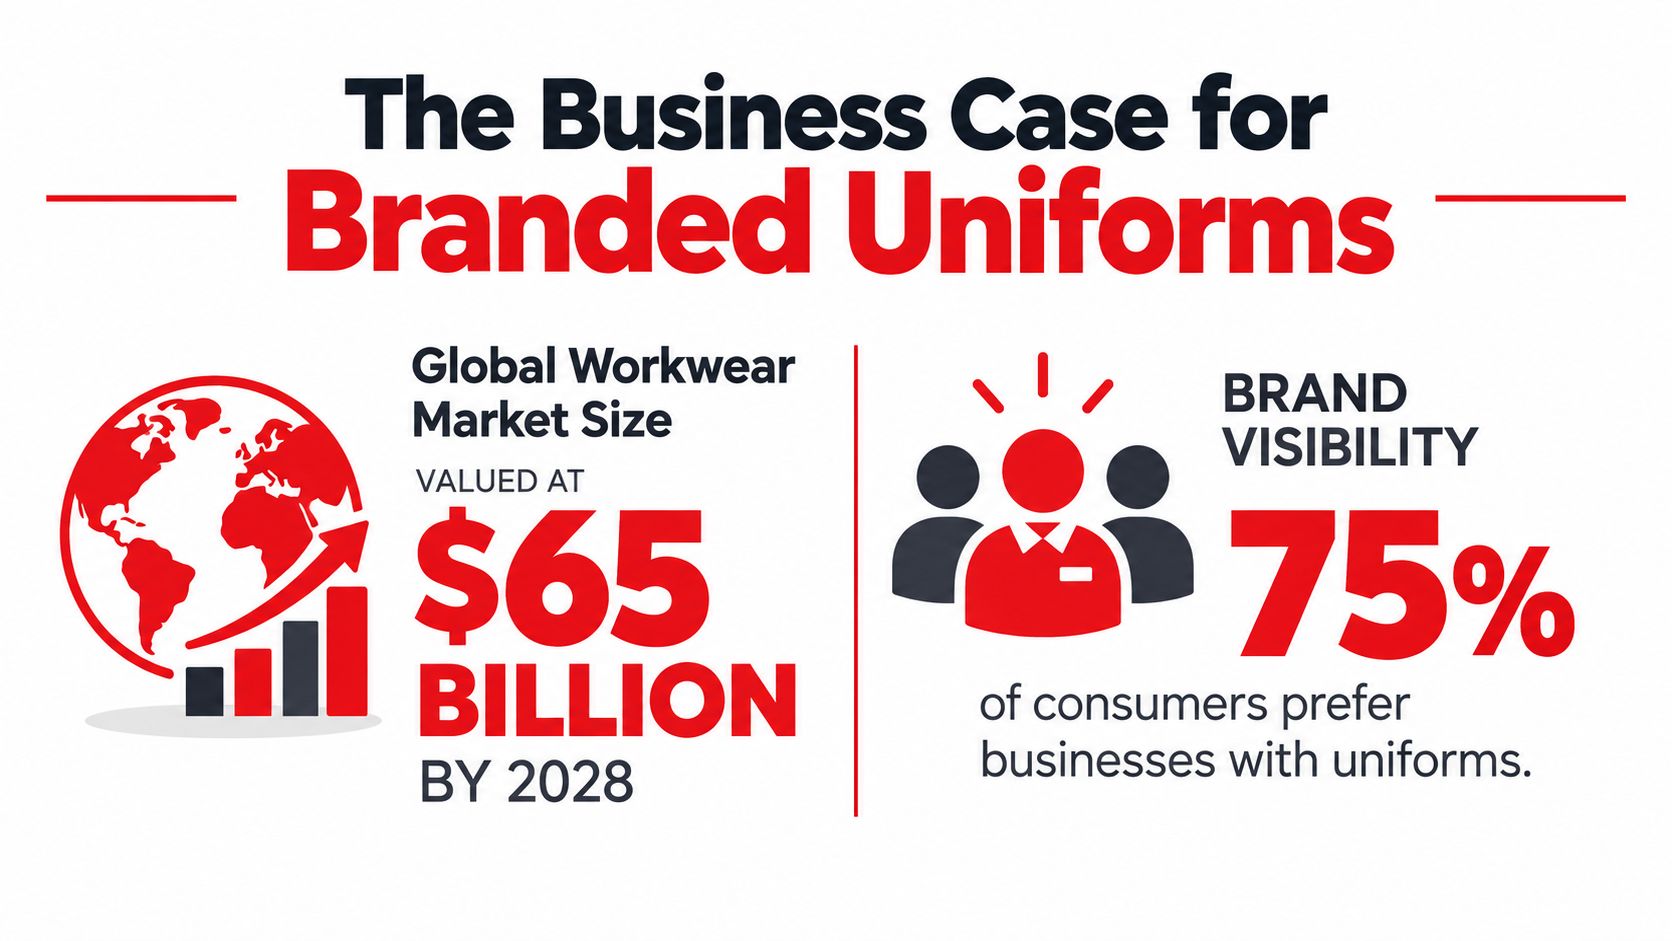
That scale matters to a business owner because uniforms aren't usually a one-time marketing purchase. Teams need replacements, new starters need garments, departments may require different specifications, and safety roles may need certified clothing. A durable logo application helps the garment continue doing two jobs at once, identifying the employer and supporting the employee's working requirements.
Branding began with practical workwear
Visible branding on work clothing also has historical depth. A historical overview traces branded workwear traditions to the 19th century, including Levi Strauss's copper rivets introduced in 1876 and leather patch added in 1886 (history of clothing branding). The commercial lesson is straightforward. Work garments already identified the workers and the businesses associated with them, so durable external details naturally became brand signals.
That history supports a modern procurement principle. A logo on workwear isn't merely decoration added after the garment is designed. The mark becomes part of the garment's operating system. It needs to survive the same movement, washing, exposure, and handling that the uniform itself must withstand.
You can also use the branded uniform reference visual when aligning internal stakeholders on the role of uniforms. The strongest business case is not that every garment needs a large logo. It's that every branded garment should have a clear purpose, a reliable application, and a planned replacement cycle.
Comparing DTF, Embroidery, and Screen Print
A uniform program rarely uses one decoration method for every garment. The procurement decision depends on wash conditions, fabric, artwork, order size, and the cost of replacing worn pieces. DTF transfers a printed design to the garment and handles detailed, multicolor artwork. Embroidery builds the logo with thread, giving work shirts, jackets, polos, and caps a textured finish. Screen printing pushes ink through a stencil, making it practical for bold designs and larger runs with simpler artwork.
Method | Wash Durability | Best Use Case | Fabric Constraints |
|---|---|---|---|
DTF | Often specified for 50+ wash cycles under normal domestic or light commercial laundering, with possible minor edge softening after extended testing (DTF and safety workwear guide) | Detailed, full-color logos, small runs, varied garments, and designs requiring fine detail | Test on the exact fabric, especially stretch, coated, technical, and heat-sensitive materials |
Embroidery | Can tolerate repeated industrial laundering when thread, stitch density, backing, and garment construction are matched to the care process | Daily uniforms, heavily washed corporate or trade garments, polos, jackets, and durable work shirts | Dense stitching can add weight, stiffness, or puckering to lightweight, stretchy, or loosely knit fabrics |
Screen print | Can perform well when the ink, curing process, garment, and care routine are compatible | High-volume orders, simple logos, bold graphics, and larger back or chest decoration | Fine detail, multicolor setup, dark garments, and some technical fabrics require careful testing and production control |
DTF favors detail and flexibility
DTF suits artwork with gradients, several colors, small details, or photographic elements. It also lets buyers support mixed garment orders through a broadly similar print workflow, including T-shirts, hoodies, and other apparel. That flexibility helps when a team is testing a uniform or ordering a smaller batch before expanding the program.
The trade-off is lifecycle certainty. A domestic or light-commercial wash rating should not be treated as proof of performance in an industrial laundry. Ask the decorator to test the actual garment, decoration, detergent, temperature, and drying process. A logo that looks excellent after sample production may soften at the edges or lose clarity under a harsher routine.
Use this DTF production visual when explaining the process to stakeholders comparing full-color options. A heavyweight fleece example, the RXB Marlboro Rodeo Hoodie, uses a three-dimensional velvety chest logo on an 8.5 oz./yd² 70/30 ring-spun cotton/polyester three-end fleece with a 100% cotton face, fleece-lined hood, double-needle seam construction, and generous fit. Those details affect how a raised or transferred logo feels and how it interacts with the hood, chest, and wearer movement.
Embroidery prioritizes resilience and texture
Embroidery is usually the first option to evaluate for uniforms exposed to repeated laundering, abrasion, and routine handling. Thread becomes part of the fabric structure instead of forming a surface film, and the raised finish supports a traditional corporate or trade appearance.
The method still needs control. A large, dense logo can feel stiff or heavy on thin performance fabric. Small lettering may need simplification to remain readable after stitching. Request a stitch-out or physical sample before approving production, particularly when the mark includes narrow shapes, fine text, or a high stitch count.
For mixed uniform programs, compare the cost of decoration with the replacement cycle. Embroidery may justify its higher initial setup when garments face frequent industrial washing, while DTF may reduce entry cost for detailed artwork or smaller quantities.
Screen print makes sense for bold volume work
Screen printing fits simple marks, strong color blocks, and larger placements that do not require DTF-level detail. It can be efficient for a high-volume order, though setup, color count, curing, and garment compatibility affect the final cost and performance.
Ask whether the ink was selected and cured for the specific fabric, then confirm the care routine the production partner expects. A bold, correctly cured print can perform well. A rushed or poorly cured print can crack or fade, regardless of the method's reputation. Safety garments also require testing that preserves the visibility and performance of the underlying garment, rather than treating decoration as a separate decision.
Strategic Logo Placement by Industry Role
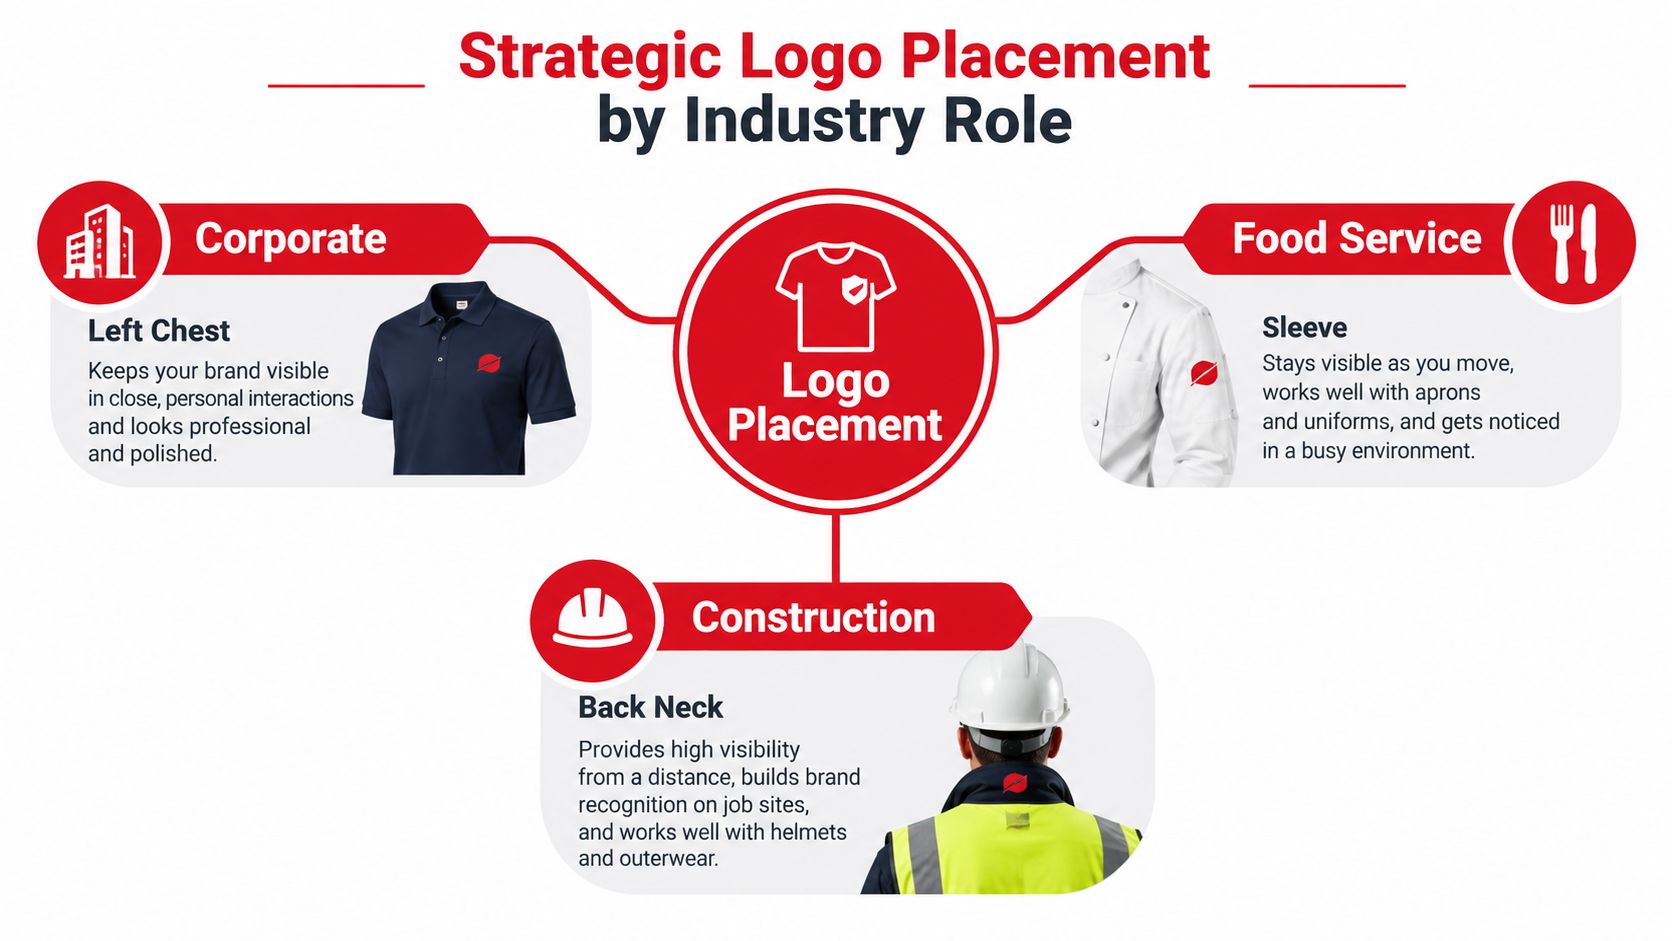
Left chest is a useful default because it keeps the mark visible without dominating the garment. It isn't a universal answer. Placement should reflect who needs to recognize the wearer, how the garment moves, and which areas the garment construction or safety specification leaves available.
Corporate and customer-facing teams
For office staff, consultants, and many retail roles, a left-chest logo usually provides a controlled, professional mark. A smaller application can work better than a large graphic, especially on polos, button-downs, sweaters, and jackets intended for meetings or customer interaction.
Hospitality and food service teams may benefit from sleeve placement when the chest area already contains a name badge, pocket, or other operational identifier. A sleeve logo stays visible while the employee moves through a dining room or service area. Tone-on-tone embroidery can preserve a refined look, while a contrasting mark may improve recognition at a distance.
Site, security, and construction roles
Construction and security teams often need identification that remains visible when workers turn away from the customer or move around a site. An upper-back or back-neck mark can provide useful recognition, provided it doesn't conflict with reflective tape, ventilation features, harnesses, or other equipment.
The correct location also depends on fixed garment landmarks. A production partner should map the logo against seams, pockets, zippers, plackets, and reinforcement panels. Those landmarks are more reliable than a vague instruction such as “center it on the front,” especially when the order includes mixed sizes.
Production check: Approve placement on the actual garment style, not only on a flat digital mockup.
Build a placement map before ordering
Create a simple garment matrix with one row for each role and one column for each garment. Record the primary logo position, any secondary identification mark, decoration method, and exclusions such as pockets or reflective tape. This prevents a single artwork file from being stretched across garments that need different treatment.
You can use the role-based placement reference as a starting point for that discussion. The useful outcome isn't a universal placement rule. It's a repeatable map that tells production exactly where the logo belongs on each garment and why.
Navigating Safety Standards and Compliance
A logo can compromise a safety garment if the decoration reduces the visible certified area or covers a feature the garment relies on. For high-visibility workwear, the fluorescent and retroreflective coverage required by EN ISO 20471 and CSA Z96-15 must remain intact. Practical guidance recommends placing logos in non-critical zones such as the left chest or upper back, keeping decoration away from reflective tape, and limiting print size so the certified visible surface area isn't reduced (high-visibility logo guidance).
That requirement changes the approval process. A logo that looks balanced on a standard polo may be unacceptable on a hi-vis vest because the vest's panels, tape, and contrast areas serve a safety function. Never approve a large chest transfer or patch merely because the blank space appears convenient.
Treat the garment certification as a design constraint
Before decorating, identify the garment's certification, intended use, and manufacturer's decoration instructions. Ask the supplier to confirm approved decoration zones rather than assuming any area without tape is safe. The production partner should also review whether the chosen application affects the garment's certified construction.
Flame-resistant garments require additional caution. Decoration materials, backing, thread, adhesives, and inks may affect the garment's performance, so a standard transfer workflow shouldn't automatically be applied to FR clothing. Request written compatibility guidance and retain it with the order documentation.
Keep safety and identification separate
A hi-vis garment may need a small employer mark and a separate identifier for a team, contractor, or role. Use non-critical areas for branding, then rely on approved garment features and compliant identification methods for safety visibility. Enlarging the logo isn't a substitute for a proper safety review.
Compliance rule: The supplier's confirmation should cover both the garment certification and the decoration method. A visual proof alone isn't enough.
Real-World Scenarios for Custom Apparel
Three teams can use the same brand mark and still need three different uniform programs. The ranch operation values rugged construction and a tactile identity. The technology company needs understated consistency across premium polos. The event organizer needs fast recognition without compromising the visibility function of a hi-vis garment.

A ranch operation needs a garment-first decision
A ranch team may choose heavyweight hoodies or durable work shirts that face outdoor exposure, dirt, friction, and frequent wear. A raised chest mark can support the brand's western identity, but the production team should check whether the finish catches on equipment, feels uncomfortable under layers, or creates a washing requirement the crew won't follow.
For a fleece hoodie, keep the artwork away from the hood seam, kangaroo pocket opening, and high-flex areas. A compact chest position can be more practical than a large front graphic, particularly when workers bend, layer, or carry tools.
A corporate team needs repeatability
A technology company outfitting staff for offices, conferences, and customer visits may favor polos, sweaters, or lightweight jackets. Embroidery can create a restrained finish, while DTF may be appropriate for a detailed mark on selected garments when the wash environment is controlled.
The main operational risk is variation. Different garment colors, sizes, fabric compositions, and suppliers can make one logo appear inconsistent. Approve a physical sample on the primary garment and define the logo size, thread or print colors, position, and acceptable tolerances before the full order.
A mixed uniform program also benefits from role-based choices. Corporate-facing employees may use left chest branding, while event or field staff may need a secondary back identifier that remains visible in crowded environments.
For a visual comparison of how different roles can evaluate apparel requirements, review the production planning example below.
An event organizer needs recognition without shortcuts
Event staff often need quick identification, but a hi-vis vest isn't an unrestricted canvas. Keep the logo in an approved non-critical area and preserve the fluorescent and retroreflective coverage. If staff need a large identifier, discuss compliant garment layouts with the supplier instead of placing a large transfer across the back by default.
For every scenario, the best order brief records the role, garment, decoration method, location, laundering routine, and approval sample. That information lets the production team make consistent decisions instead of treating each garment as an isolated artwork placement.
Preparing Your Artwork and Garment Order
Start with the logo files, but don't stop at a single flattened image. Provide vector artwork when available, including AI, EPS, or PDF files, and include a high-resolution raster version for reference. Vector files allow the production team to adjust scale and simplify shapes for embroidery or screen printing without relying on a pixelated image.
Use a production checklist
Gather vector files: Include the approved logo, brand colors, fonts or outlined lettering, and any usage restrictions.
Choose the garment blank: Confirm fabric, weight, fit, color, pocket layout, seams, and care instructions for each role.
Select the print method: Match DTF, embroidery, or screen print to the garment and laundering environment.
Request samples: Approve a physical sample or stitch-out, and check placement on different sizes rather than trusting one digital mockup.
Finalize the order: Confirm quantities, size breakdown, artwork version, decoration positions, care instructions, and production approval in writing.
Color management matters most for DTF and screen printing, while embroidery requires attention to stitch density, thread colors, underlay, and small lettering. Ask the production partner which file preparation they need instead of converting artwork blindly.
A reliable partner should also help confirm garment suitability before production. Wear X Apparel, LLC provides garment selection support and DTF printing for custom designs on T-shirts, hoodies, and other apparel, with services covering artwork intake, print application, and quality checks. Visit Wear X Apparel, LLC to discuss your garment options, logo requirements, and production workflow before placing the order.
header.all-comments